Powered by Blogger.
My Blog List
-
1 month ago
-
3 years ago
-
4 years ago
-
5 years ago
-
6 years ago
-
7 years ago
-
8 years ago
-
9 years ago
-
10 years ago
-
10 years ago
-
11 years ago
-
12 years ago
-
13 years ago
-
Total Pageviews
Sunday, February 23, 2014
Tender Easter CT Tag & Tutorial
CT Tag & Tutorial
(Tutorial will be added soon)
Scrapkit *Tender Easter* By Bubble's Dream
You Can Purchase It At
www.Scrappindollars.com
Tube Used *Lucy* By Di_Halim
You Can Purchase It At
www.Picfordesigns.com
DO NOT SHARE TUT or TAG,
But You Can Share The Link Back To My Blog!
Thursday, February 20, 2014
Buddercup Fun- CT Tutorial
Buddercup Fun
Scrapkit: Buddercup Fun By:
CCDesigns
www.mysticalscrapstore.com
Tube: PinUp Toons – 31-1
Carrie-Glasses
www.cdostore.com
Software: Paint Shop Pro 9
Drop Shadow On All Elements
-5, -6, 50, 5.00, Black
*****
Let's Get Started
Open ccd_Frame2
Resize- 375-458
Copy and Paste to New Image
800x800
Open ccd_Paper8
Resize to fit behind Frame2 (Copy
& Paste)
Open ccd_umbrella1
Copy and Paste as New Layer
Open ccd_butterfly1
Resize to your discretion
Copy and Paste as New Layer(on
umbrella)
Open ccd_mushroom2
Resize to 200-217
Copy and Paste as New Layer
**Please Refer To My Image For
Guidance**
Open ccd_danglie1
Resize to 100-158
Copy and Paste as New Layer
(dangle off the umbrella)
Open ccd_light1
Resize to 100-256
Copy and Paste as New Layer
Open ccd_flower11
Resize 250-165
Copy and Paste as New Layer 4x's
Open ccd_bling4
Copy and Paste as New Layer
Behind ALL Layers
Open Tube
Resize to your discretion
Copy and Paste as New Layer
ALL DONE!!
Be Sure To Add Copyright Information and License Number
For Name...Use The Font Of Your Choice.
Monday, February 10, 2014
SummerLovin-CT Tag1/SpringFlowerGirl-CT Tag2
Thursday, February 6, 2014
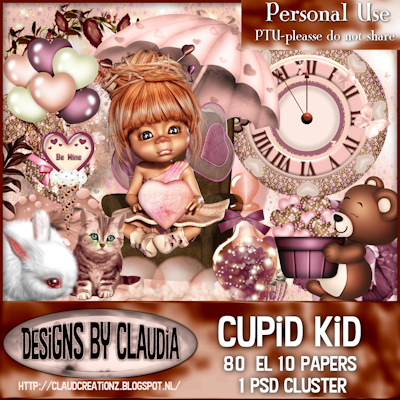
Cupid Kid CT Tags 1 & 2
Tags Made By Me
Using Scrapkit *Cupid Kids* By Designs By Claudia
You Can Purchase her scrapkit
(Kit Preview)
Wednesday, February 5, 2014
Urban Chick CT Tag & Timeline Cover
Tuesday, February 4, 2014
Summer Nights CT Tags
Summer Nights Tags 1 and 2
Using ScrapKit *Sunset Summer*
By: Creative Scraps By Crystal
Purchase it HERE
Tags By Me
Lovely Ladybugs CT Tags
These Tags Were Made By :JodieLeigh's Creations
Using The Kit *Lovely LadyBugs* By Creative Scraps By Crystal
You Can Purchase This Scrapkit
Monday, February 3, 2014
Teal The End - CT Tutorial
Teal The End Tutorial
By: JodieLeigh's Creations
Scrapkit Love Me Not By:
Black Widow Creationz
You can Purchase it HERE
Tube Amanda By: Verymany
You can Purchase it HERE
***
This tutorial is written with the
understanding
that the user has a good
working knowledge of psp.
Any similarities is strictly
coincidental
***
Before we begin, note that all
layers are accompanied by a drop shadow of the same.
Effects, 3D Effects, Drop Shadow
OV(-4) H(-3) AO (50) Blur (5.00)
Color (Black)
Let's Begin
New Image
Layer 600x600- Transparent Bkgrd
Open EL12-
Copy and Paste to New Image
Open Paper
PP6- Copy and Paste
Position
behind EL12- Resize to fit
Open EL13
and EL14
Resize to
450x436
Copy and
Paste to canvas 3 x each
(refer to my
tag for guidance)
Open EL2 – Resize to 450x170
(49%)
Copy and Paste to Canvas
Position behind flower
(EL13-14)Layers
Open Tube: Amanda
Close out all layers except the
teal/blue shirt layer and skirt.
Merge these layers-Copy & Paste
to Canvas
Open EL22- Resize to 450x423
Copy and Paste to Canvas
Hang off the heel of Tubes Shoe
Open EL15, EL16 and EL27
Resize all 3 elements to 299x537
Copy and Paste to Canvas
(refer to my tag for a guidance)
Remember Your Drop Shadows On All
Layers
Remember To Add Copyright
Information
ALL DONE!!
Crazy Love Tutorial
By: JodieLeigh's Creations
Scrapkit Be My Love By:
Black Widow Creationz
You can Purchase it HERE
Tube Dark Queen By: Alex
Prihodko
You can Purchase it HERE
Mask KBH_2013_Mask5 By:
Kaci Too (Creative Misfits)
You Can Find It HERE
***
This tutorial is written with the
understanding
that the user has a good
working knowledge of psp.
Any similarities is strictly
coincidental
***
Before we begin, note that all
layers are accompanied by a drop shadow of the same.
Effects, 3D Effects, Drop Shadow
OV(-4) H(-4) AO(50) Blur(5.00)
Color(White)
Lets Get Started
New Image
600x600 Transparent
Open PP10-
Copy & Paste to New Image
Layers-Load/Save
Mask-Load Mask From Disk
Click on
Mask KBH_2013_Mask5- OK
Open
EL2- Copy & Paste to New Image on Mask Layer- Merge
(No
Drop Shadow To Here)
Open
EL17- Resize to 450x450
Copy
& Paste to New Image on Mask Layer
(Apply
Drop Shadow & On All Layers From Here)
Open
EL16- Resize to 450x410
Copy
& Paste to New Image 3x
Position
behind EL17
(Refer
to my tag for guidance)
Open
EL40- Copy & Paste on New Image
Position
Behind EL17
Open
Tube * Dark Queen*
Resize
to 450x619 (41%)
Copy
& Paste to Canvas
(Remember
drop shadows & Refer to my Tag for Guidance)
Open
EL15- Resize to 450x161 (51%)
Copy
& Paste Below Tube
Layers-
Merge – Merge Visible
ALL
DONE!
Don't
forget to add your copyright & Other required Information
For
Name I used Font Champignon-Size 36
Subscribe to:
Comments
(Atom)
Labels
- CT Tag & Tuts - Kits By: Freeks Creations (1)
- CT Tag & Tuts - Scrappin Dollar Store (4)
- CT Tag-Kit By Rissa's Designs (3)
- CT Tags (17)
- CT Tags & Extras (3)
- CT Tags & Tuts - Beehive Tubes (4)
- CT Tags & Tuts - Kits By Soxational Scraps (1)
- CT Tags & Tuts- Kits By Claudia (3)
- CT Tags & Tuts-Kits By ScrapzNCompany (1)
- CT Tags & Tuts-Kits By ScrapzNPleasure (1)
- CT Tut - Kit By BWC (4)
- CT Tut-Kit By Creative Scraps By Crystal (8)
- Mystical Scraps Store Tuts (3)


